For our final tranformation of the 3D mesh we went back to the 3 dimensional and were able to explore , bt this time we could use whichever material we wanted, we were not limited to newspaper. I was relieved as I found it difficult to express my ideas on paper without gravity to test my ideas.
I decided to make 2 "tents" with the fabric holding the poles and the poles shaping the fabrice and the 2 tents together making a 3rd shape.
I had difficulty in finding the right material and then getting it to stick together. Glue was too messy and even though my sewing was primitive it still could not solve my problem of hiding the seems, so I decied to accentuate them.
Even though each tent is the same in mateial, the difference is the placement of the poles. One on seems and one away from the seems, resulting is 2 dramaticaly different shapes.
A professor form the other studio, Chris Falliers, checking out Bens work.
Jess posing with his form.
Everyone was fascinated by what John had to say about his Sod tower.
Wednesday, September 27, 2006
Tuesday, September 26, 2006
Figure Drawings
For our first 3 fridays of RePresentation we did figure drawing. For the first friday we drew our hands. Which despite the fact that I've done it many times, it is still a great exercise. The remaining 2 fridays we had Eva come in and model for us.
Here are 3 five minute sketches on one page. I was proud of the compostion between the 3 and connecting them with the angle on the fly.
The second time aroudn I concentrated on spaces she made with her limbs.
This is my favorite of the whole exercise. She is sititng on the ground, leaning over her legs. We are looing between her torso, arm and leg at her head and ear.
Wednesday, September 20, 2006
Shaceship - 3D Mesh
For the second week of studio we were to transform out initial form, but this time only in 2D, on paper. I found this very difficult as gravity was a big part of my initial model and it's hard to draw gravity. After struggling for inspiration, I decided to use my own model as the inspiration using it as the starting point for the week.
Here is my pinup.
By drawing line segments from points off the previous unit and connecting them to make facets I came up with spaceship shape. This is a section cut lengthwise through the object.
This is a section cut width wise.
Finally a section of the piece made with leafs and twigs. I used these materials to hopefully soften the look of the project and ot realize that the object was just skin and bones.
Wednesday, September 13, 2006
Newspaper - 3D Mesh
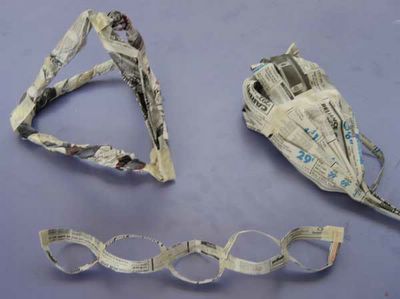
Our first assignment of the school year was to build something out of newspapers that was 10"x20"x30" and that was tied to an "operative" term, mine was Graft. Our first step was to make several sketch models to help us express our ideas and get use to the properties of newspaper.
Above are a few of my models tat I did not use. The bottom one that looks like a chain was nice in that I grafted to strips together to form a kind of chain with with quarter spehre shapes, but ultimately I was intrigued by some co-dependent B's.
The process of how I got the final cube tower as well as the initial B is above. What I liked that was the B needed to attach to the others in order for it to stay up. My problem was that in oder to get to my target 30" height I needed some help.
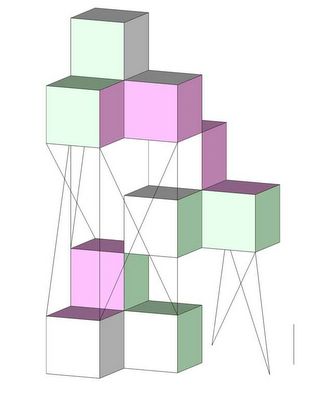
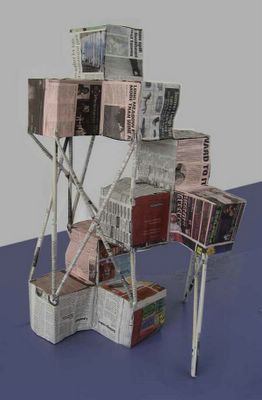
The plan was to use a set of stalks that would act as columns and would holp up the cubes, but I also wanted to have the cubes hold up the columns. Here is an initial Sketchup Model of my piece
The final piece
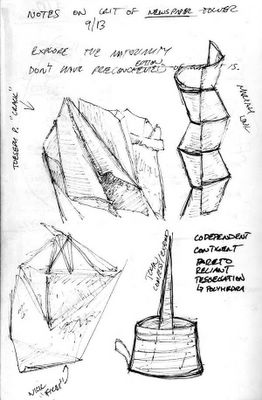
Sketches of some of my classmates projects.
Friday, September 08, 2006
Re:Presentation
I have Representation with Keith Plymale, who taught the summer class as well. I love the equation he put up during our lecture today.
Wednesday, September 06, 2006
Studio One
Studio is the main class of any architecture school and today was our first class. My section will be taught by Joe Sabel and Peter Anderson. The 2 minute bio of Joe is immortalized in my sketch above. Peter could not make it as he was in Venice at the Biennale.
Tuesday, September 05, 2006
M'Arch Theory
Today was the first day of School and the class I was most nervous about was THEORY. As it turns out we are splitting the class into 2 sections of 12. We'll lead discussions on an article in our reader and then present the work of a contemporary architect.
The sketches above are from slides shown in our first discussion that focused mainly on manifestos and in this case, Antonio Sant'Elia.
Subscribe to:
Posts (Atom)